Connect a SAML Service
Register service
A deployed Shibboleth Service Provider (SP) only becomes useful after registering the SP in a Federation. The following steps show how to register an SP.
If you have not done so already, please log in to Federation Manager to get started.
Once you have clicked on ‘SAML’ on the ‘Connect a New Service’ page, you will then be taken to the Register a SAML Service Provider page:
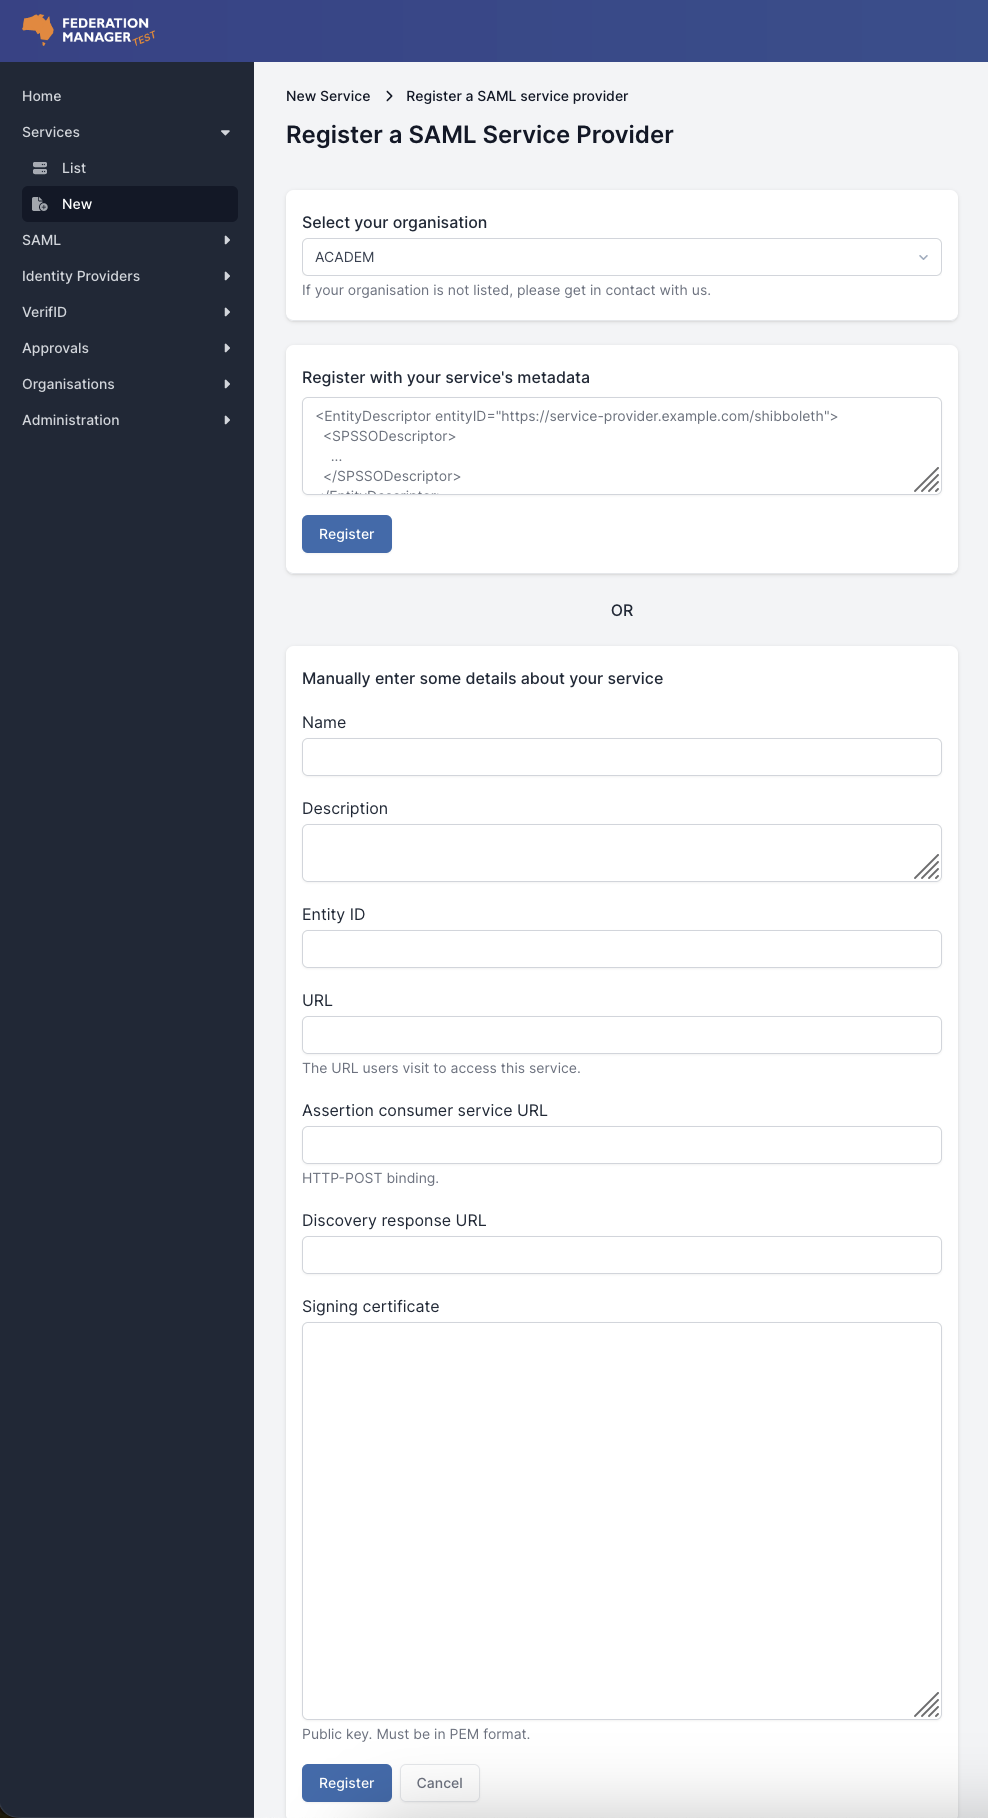
There are two methods for providing the SAML details for the new service:
- automatic, or
- manual
Automatic Method (top section of form)
Available to SPs operating with Shibboleth or SimpleSAMLPHP and relies on these products responding on their default metadata endpoints.
To complete registration please provide the following information:
- Select the Organisation under which the SP will be registered.
- Enter your service’s metadata.
- Click ‘Register’.
Manual Method (bottom section of form)
Manually requires the deployer to complete the following fields with the necessary information and assumes that the deployer is familiar with the SAML end-points for their service.
To complete registration please provide the following information:
- Name - a service name
- Description - a description of the service
- Entity ID - the service’s entity ID
- URL - the service’s landing page URL
- Assertion consumer service URL - the endpoint provided by the SP where SAML responses are posted.
- Discovery response URL -
https://ds.test.aaf.edu.au/discovery/aaf - Signing certificate - Provide the contents of the public key certificate created by the Shibboleth installation, this is not the web server SSL public certificate.
-
Select those attributes that the application requires. The selection of attributes should match those attributes enabled in the attribute-map.xml file. If following the instructions for the Simple PHP Server installed on Linux example or the Dockerizing Shib-SP example, the default Shibboleth installation enables the attributes eppn and affiliation.
-
Click Register to complete the registration step.